Application for connection: различия между версиями
Нет описания правки |
|||
| Строка 1: | Строка 1: | ||
[[Application_for_connection|en]] | [[Заявка_на_подключение|ru]] | [[Application_for_connection|en]] | [[Заявка_на_подключение|ru]] | ||
'''ATTENTION: This section is declared deprecated as of ERP "UserSide" version 3.18. It will be deleted in version 3.19. Use the ''[[API_EN|API]]'' section to organise the receiving of requests and create tasks''' | |||
It is possible to organise receiving requests for network connection on the company's site ''(or any other resource)''. To make it work - access to your ERP "UserSide" web address is required. | |||
At ''userside/script/newin/sample.php'' you can find an example of such an application. | |||
Online application example for [[Demo-version|Demo-version]]: http://demo.userside.eu/script/newin/sample.php | |||
[[File:2024-02-02 21-08.png|thumb|800px|center]] | |||
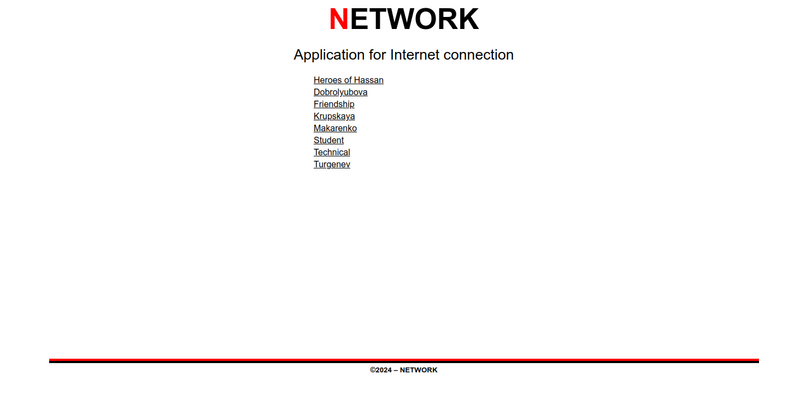
A potential customer only needs to select their building on a map or list and click on it. | |||
[[File:2024-02-02 21-10.png|thumb|800px|center]] | |||
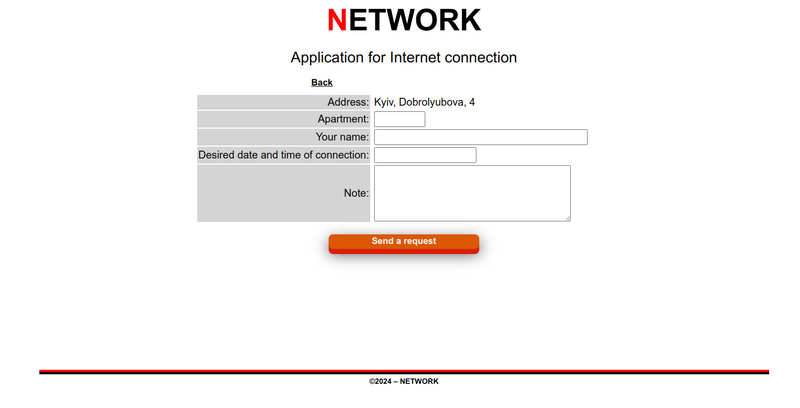
Next - fill out the required information and submit the application. | |||
== Configuration == | |||
1. Settings - Main - Internal modules - Application for connection - set to "Yes" | |||
2. Settings - Main - Connection request - choose [[Settings - Tasks|what type of task]] will be created when submitting an application and what text should be displayed to the potential customer after submitting the application | |||
3. if you need to add any additional fields to the application, add the necessary additional fields in the task settings for this type of work. | |||
== Mechanics == | |||
Open the text of the userside/script/newin/sample.php file to understand how it works. '''Don't use this particular file for yourself - you'd better rename it under your own name, as it may get updated with system updates.''' | |||
Actually to add a connection request on any of your sites - you need to add in the tags | |||
<HEAD></HEAD> lines: | |||
<script src="https://ajax.googleapis.com/ajax/libs/jquery/1.9.1/jquery.min.js"></script> | |||
<script src="https://demo.userside.eu/main/js/leaflet.js"></script> | |||
And in the place where the application is supposed to be placed - the lines: | |||
<script> | |||
document.write('<div id="us_div_app"></div>'); | |||
$("#us_div_app").load("https://demo.userside.eu/api.php?kat=newin&address_id=1"); | |||
</script> | |||
Only instead of the address of our demo-version - it is required to enter the address to your system, where | |||
&address_id=1 - specify the identifier of the required settlement or address object | |||
The settlement must be specified on the map, otherwise the map will not be displayed. Placement of a settlement on the map is performed in the "[[Address_system#Address_units|Settings - Addresses]]" section - in the settlement properties | |||
When a request is submitted, it will go into the [[Work_schedule|Work schedule]] with the date of creation and execution - for the current time. Other fields in the requisition will be recorded in the task notes. | |||
Buildings marked "Hide from users/customers" ''(see [[Address_system#Address_units|Setup - Addresses]])'' will not be displayed in the requisition | |||
This way - you can use both the given example ''(sample.php)'' and insert into the application in your site. The default styles and appearance of the elements will be used from your site, however it is also possible to reassign the appearance of the elements. To do this - again - the source file sample.php - there it is all specified. | |||
Версия от 19:25, 2 февраля 2024
ATTENTION: This section is declared deprecated as of ERP "UserSide" version 3.18. It will be deleted in version 3.19. Use the API section to organise the receiving of requests and create tasks
It is possible to organise receiving requests for network connection on the company's site (or any other resource). To make it work - access to your ERP "UserSide" web address is required. At userside/script/newin/sample.php you can find an example of such an application.
Online application example for Demo-version: http://demo.userside.eu/script/newin/sample.php

A potential customer only needs to select their building on a map or list and click on it.

Next - fill out the required information and submit the application.
Configuration
1. Settings - Main - Internal modules - Application for connection - set to "Yes"
2. Settings - Main - Connection request - choose what type of task will be created when submitting an application and what text should be displayed to the potential customer after submitting the application
3. if you need to add any additional fields to the application, add the necessary additional fields in the task settings for this type of work.
Mechanics
Open the text of the userside/script/newin/sample.php file to understand how it works. Don't use this particular file for yourself - you'd better rename it under your own name, as it may get updated with system updates.
Actually to add a connection request on any of your sites - you need to add in the tags <HEAD></HEAD> lines:
<script src="https://ajax.googleapis.com/ajax/libs/jquery/1.9.1/jquery.min.js"></script>
<script src="https://demo.userside.eu/main/js/leaflet.js"></script>
And in the place where the application is supposed to be placed - the lines:
<script>
 document.write('<div id="us_div_app"></div>');
 $("#us_div_app").load("https://demo.userside.eu/api.php?kat=newin&address_id=1");
</script>
Only instead of the address of our demo-version - it is required to enter the address to your system, where
&address_id=1 - specify the identifier of the required settlement or address object
The settlement must be specified on the map, otherwise the map will not be displayed. Placement of a settlement on the map is performed in the "Settings - Addresses" section - in the settlement properties
When a request is submitted, it will go into the Work schedule with the date of creation and execution - for the current time. Other fields in the requisition will be recorded in the task notes.
Buildings marked "Hide from users/customers" (see Setup - Addresses) will not be displayed in the requisition
This way - you can use both the given example (sample.php) and insert into the application in your site. The default styles and appearance of the elements will be used from your site, however it is also possible to reassign the appearance of the elements. To do this - again - the source file sample.php - there it is all specified.